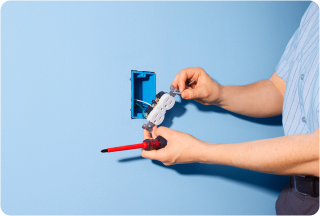
Safety First: How to Change a Light Socket Step By Step

Before you throw out your favorite lamp, see if the problem is only a loose socket or one that needs to be changed. Learn how to easily change the light socket.


Before you throw out your favorite lamp, see if the problem is only a loose socket or one that needs to be changed. Learn how to easily change the light socket.
Is your favorite lamp not working? The good news is that the problem might be a loose light socket or one that's simply no longer working. The good news is that not only are replacement light sockets inexpensive, but installing one is something even a novice DIYer can handle.
Of course, you will still be working with electrical components, so you'll want to take the right safety precautions. This step-by-step tutorial will walk you through the entire the repair process of how to change a light socket.
Step 1. Choose the right replacement part.
Examine your lamp for information about wattage and voltage allowances. In many cases, this information is printed on the socket itself. Your replacement socket should be identical to the original part. If necessary, first remove the lamp socket (see Step 6), take it to a hardware or electrical supply store and ask the staff there for assistance with choosing the correct replacement.
Step 2. Disconnect the lamp.
Unplug the lamp. Never try and change a light socket — or repair anything electrical — with it plugged in or powered on.
Step 3. Remove the lamp hardware.
Remove the lampshade, unscrew the light bulb and detach the lamp's harp — the brass (or silver) hoop of wire that surrounds the bulb and holds the lampshade in place. The harp is attached to the amp near the base of the socket itself.
Thinking about coverage?
Security for your home. Protection for your budget.
Step 4. Loosen the light socket.
Some light sockets are held in place using a simple socket shell, while others may be attached using screws that attach to a mounting bracket. In most cases, however, socket removal is as simple as detaching the socket shell from its surrounding "push-thru" shell cap. The socket may screw into the cap, or it may be held in place by a brass collar. Look for the word “Press” embossed or stamped along the rim of the shell cap. If present, it will most often appear on opposing sides of the cap. Squeeze the shell at those two points and pull up to remove the socket. If the socket resists, insert the end of a flat-blade screwdriver between the base of the socket and the side of the socket shell. Gently pry the shell up and off the socket base.
Step 5. Disconnect the socket.
With the socket pulled up from the shell, locate the two wires attached to the light switch mechanism. Make a note of which color wire is attached to which color screw before disconnecting the wires. Lamp switches typically have brass screws that secure to the hot (black) wire and silver screws that secure the neutral (white) wire.
Step 6. Remove the socket.
Loosen the socket's terminal screws — the ones holding the wires in place — and detach the cord. Make sure the cord is tied in a knot to keep it from being pulled out at its base. Next, unscrew the socket cap set screw, discarding it, the socket shell and the old socket.
Step 7. Attach the new socket.
Screw the appropriate wire lead to the appropriate terminal of the new socket. Then place the new socket shell over the socket and push the cover down until it snaps into the new socket shell cap. Replace the harp, light bulb, and shade. Plug in your lamp and switch it on. That warm glow means you've just learned how to change a light socket!
While changing a light socket can be an easy fix, not all electrical problems can be repaired without a professional. An American Home Shield home warranty plan covers parts of up to 23 systems and appliances, including your electrical systems. We'll help protect your budget and time when unexpected, covered breakdowns occur.
See how a protection plan can help with covered electrical line issues.

AHS assumes no responsibility, and specifically disclaims all liability, for your use of any and all information contained herein.
Have a plan for your home when things don't go according to plan
Shop Home WarrantiesDevelopment